Rather than talk about a processed image, this time around we’re going to talk a bit about processing an image. In particular, I’m going to take a simple panorama set of photos and show you one interesting trick that I did with it to produce the final result.
In this case we’ll be dealing with five Olympus E-M5 images taken with a slightly modified RRS pano head kit. You need some way to level the camera (leveling base on my tripod) and some way to rotate the camera around the right point in the lens (the RRS pano kit, where I use a slightly different sliding plate than RRS supplies, mostly because of the small distance of slide needed with the m4/3 camera). You can create the images for pano stitching handheld, but note that you might have issues with getting proper alignment if you have anything close to the camera. Since I tend to have a “near” in my landscape photos, I absolutely need to use a pano kit to get clean alignment.
I believe that panos should have a start and end point when I compose them. I tend to think “bookends”: two things at the ends framing something in the middle. Too many people take panos and just have them randomly end. For instance, in Yosemite you might have a pano that has El Capitan at one bookend position, and Half Dome at another (that’s a tougher photo to get than you might think; you’ll wander around a bit to find the spot you can do that well from). Or you could have a pano that goes past the two peaks and includes random amounts of other Yosemite detail. I think the bookended option is usually better.
So how do you find the composition? Use your iPhone (or other smartphone with a pano app). Swing it through the area you’re thinking of to capture a trial pano, then examine it. Look for the natural cropping points (those bookends I just mentioned, or something else that makes for strong ends). Now you know how far you have to swing your camera.
In the images I’m using here, my bookends are subtle: they’re trees at each end of the swing. If I go past that point with more images on the left, I get very nondescript land on the other side of the Snake River; while if I go past the tree on the right, I get a lot of ugly trail next to the shore. Neither add anything useful to the scene at hand.
Remember that you’re in manual focus, manual white balance, and manual exposure if you’re creating the images for panoramas correctly. One of those photos will generally be “hotter” than the others, though not always. The temptation is to process the images differently. Nope. Process the hot image (or the darkest image) and then apply those same changes to the others (right click, Develop Settings/Copy Settings on the image you modified, then select the other images, right click, Develop Settings/Paste Settings). I generally do this in Bridge, but you can easily do it in Lightroom and then send the images to Photoshop for merging.
Here are my five source photos in Bridge after developing:
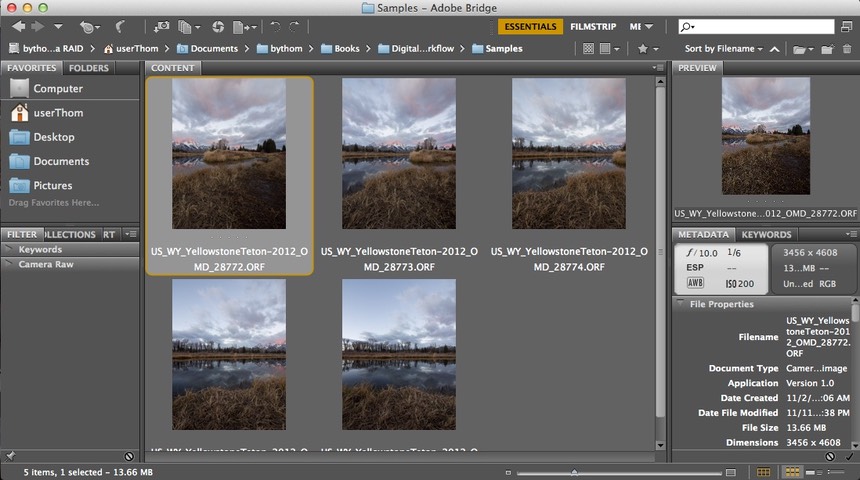
From here, I just run the Photomerge command in Photoshop (File/Automate/Photomerge).
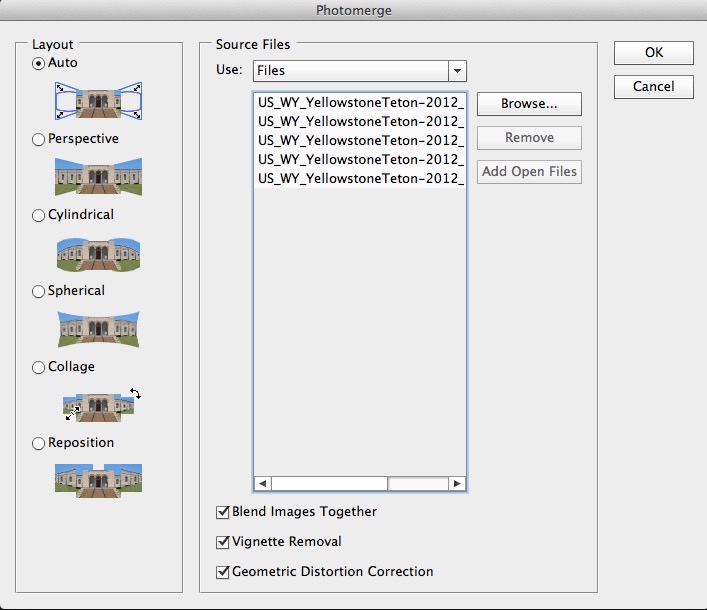
I’m not going to get into the details of the dialog here (I’ll expand on that with another project I’m working on), but there was a reason why I turned on vignette removal and geometric distortion control, and it had to do with the lens I was using. Often get a result something like this (especially when you’re using an unprofiled wide angle lens, as I was):
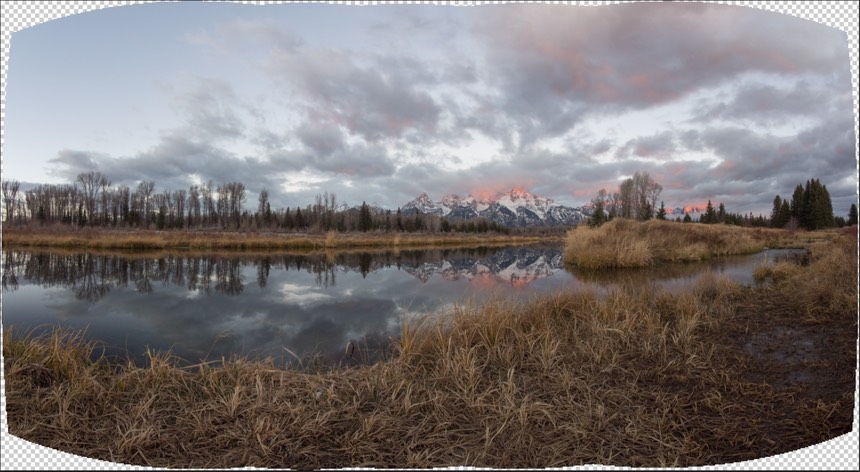
Note that result isn’t quite rectangular. We’ll deal with that in a moment. However, if the stitching looks good and well aligned, I’ll almost immediately flatten (Layers/Flatten Image) the image at this point. We’ll need to do that before I apply the trick, anyway.
At this point I’ll create my first, preferred crop, ignoring the white space. As you can see from my selection here, I’m leaving some of the white space in, but in other areas am cropping within the pixels of the stitch:
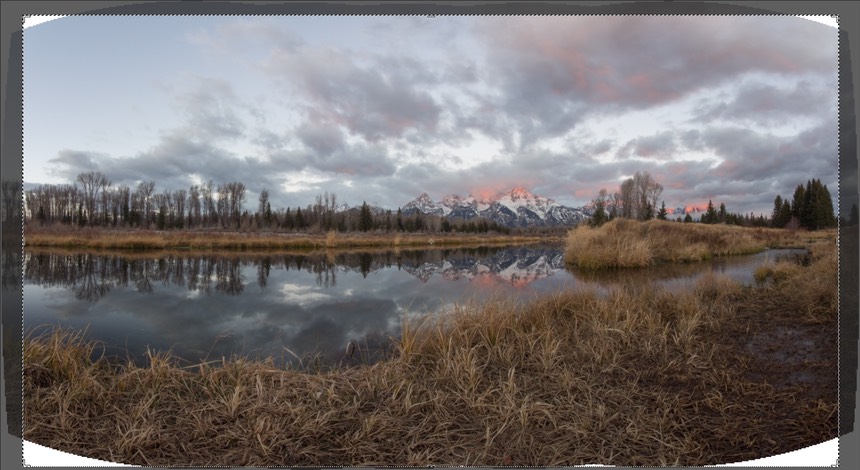
You’re probably guessing: he’s going to clone to fill in the missing sky areas at the top, but what is he going to do at the bottom? No, I’m not. Here’s the trick: Select All, Edit/Transform/Warp!
Grab the handles and intersection points as necessary to move the warp around so that your full crop area is covered. One thing to watch for is you don’t mess up the horizon when you do this. In this image I had to gently move one of the one-third intersections to keep the horizon line where I wanted it.
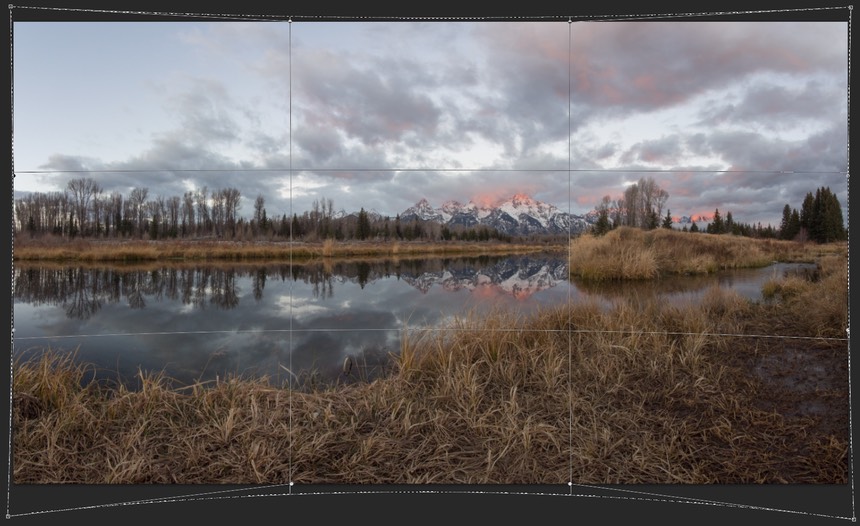
The interesting thing is that, given that I’m photographing wide angle to start with, the slight distortion this technique gives in the corners actually looks about what we’d expect. Obviously, this doesn’t work with architectural photography, but out there in the randomness of nature, it just looks like I used a really wide lens on my capture.
From there, do your normal post processing. I added sharpening, some color balancing, a few gradients and contrast touches, and ended up with:
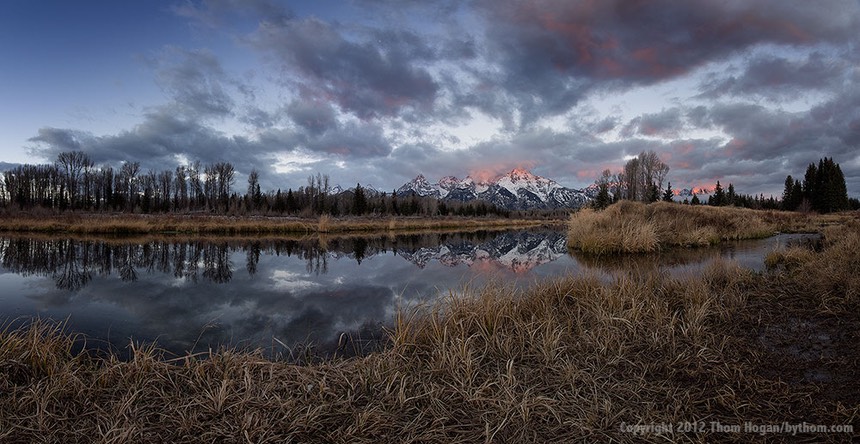
Not nearly the best pano I’ve done, but it easily prints to 36” with excellent detail and definitely catches the strange, dramatic, yet gentle nature of the light that early winter morning. Plus it stitched easily and the warp trick in the corners is essentially invisible, which kept me from having to do a lot of cloning or more cropping.