August 20
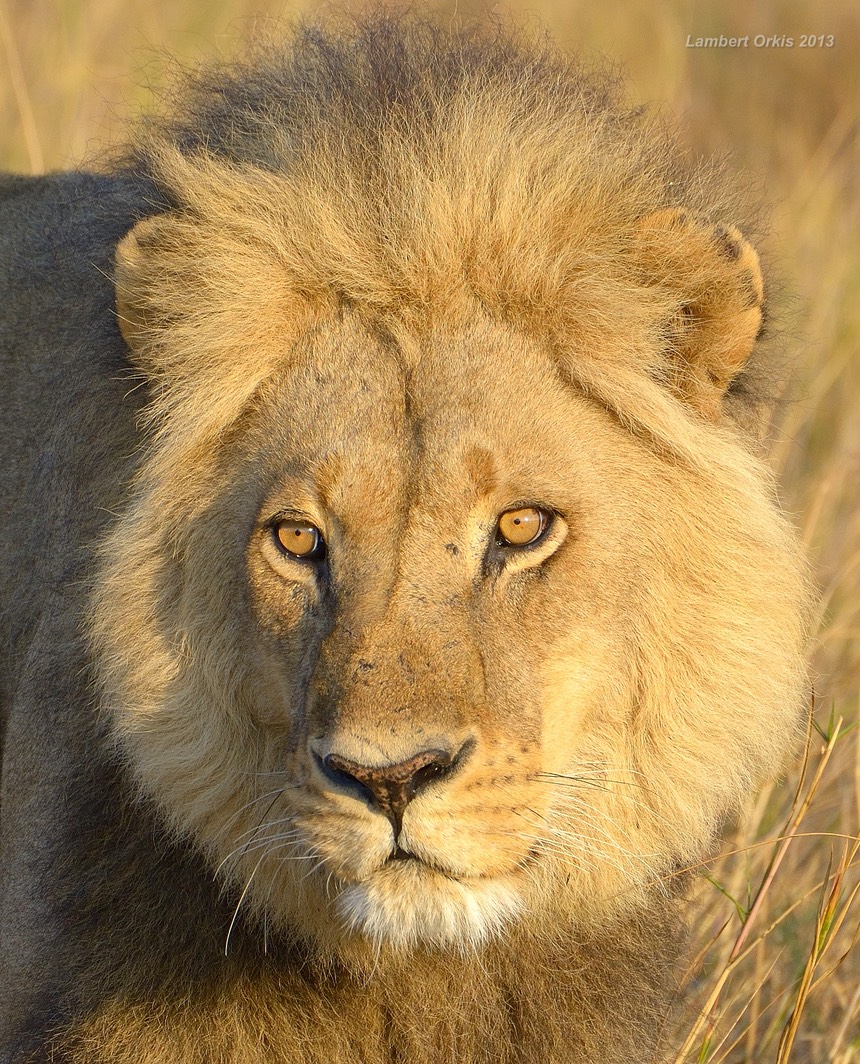
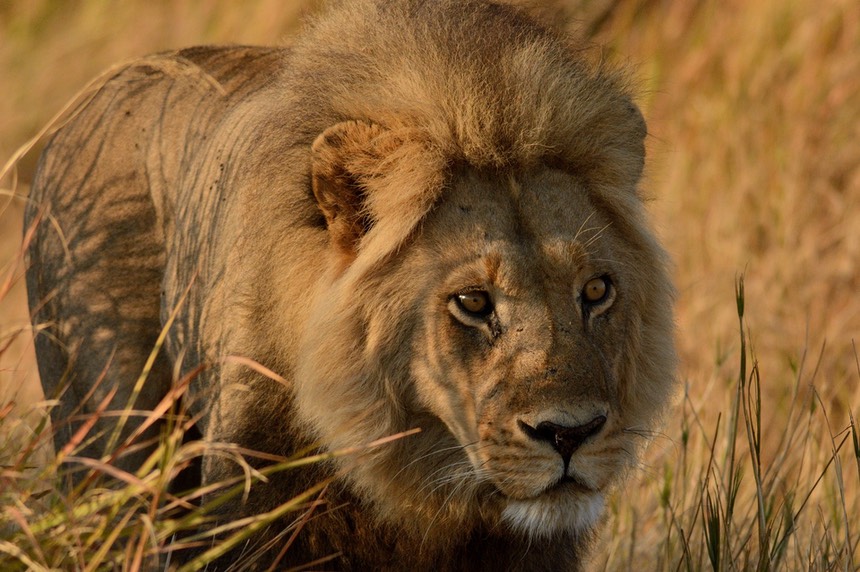
You always remember your first lion in the wild. Here are just three of the shots from students of the male that was our first lion sighting on this trip:


These images bring up an entirely different issue. I'm not messing with anyone's processing here: I'm just presenting the JPEGs as I get them from students. Orkis' image at the top has classic Adobe OverOrange syndrome. More often than not if you let the Adobe converters do their own thing with a Nikon NEF image, you'll get an abundance of "orange" in the image, which also often shows up as yellow as well as orange, and leans a lot of the colors towards green, too. A problem with Adobe's white balance choices plays into this, but there's much more to it than that. Christian's shot (second one) is closer to reality, though I think it tilts slightly towards magenta.
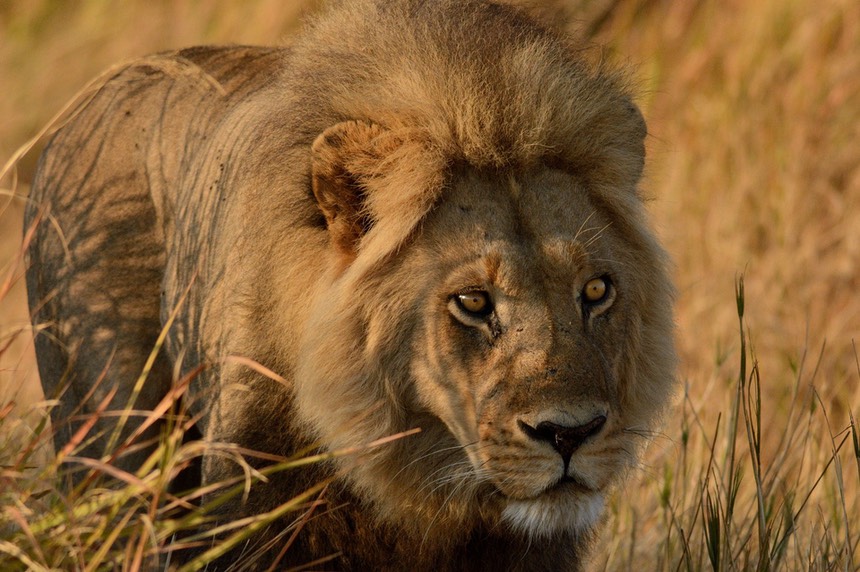
I asked for Orkis for the original NEF so that I could run it through my workflow. I picked a slightly different crop, but here's the way I see the processing:

In particular, look at the white below the lion's mouth and especially in his whiskers. It should be white. There should be a hint of green in the reeds (it was coming on spring in Botswana), but not in the lion. The eyes should have orange in them, but not yellow. And yes, this conversion was done using the Adobe converter. But to get to this rendering required intervention on my part, as is often the case with Adobe and NEFs.
I'm going to make one post processing change to the last lion photo, too. See if you can spot it:

Go ahead, scroll back up and down and see if you can see the change. It's small, but, it's important.
Give up? I lightened the eyes a touch. Normally with animals in the field like this you might consider using fill flash to do something similar, especially since this lion is walking from sun into shade. But we're really on the first full day of the workshop. It's a little too soon to start fiddling with flash on top of everything else I'm throwing at the students. Moreover, you can't always be prepared to do that. Try this instead: duplicate the layer, create a layer mask filled with black on the duplicate layer, select a white brush and paint the mask only at the eyes, now switch the blend mode for the layer to Screen. Adjust the Fill level as desired. With more time, I'd make different masks for each of this lion's eyes, as they need slightly different levels of enhancement. But it took me all of 60 seconds to do, and I think it makes for a more engaging image.
We don't actually spend a lot of time talking about post processing on safari (we have sub-optimal viewing conditions during our non-safari time each day, projectors aren't the best way to demonstrate subtleties, and keeping laptops color profiled in the field is notoriously problematic, amongst other problems). We did do some talk about processing during our review sessions, and I demonstrated the "eye trick" at one point, but I'm starting to realize that perhaps having a full image processing session at the right facility at the end of a workshop with a calibrated projection system and screen might be useful to everyone.
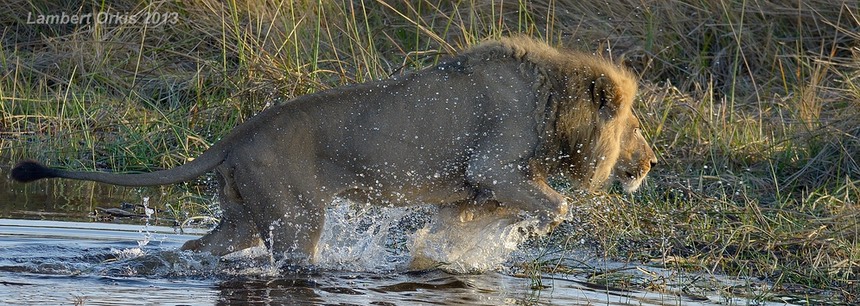
This particular lion also had to cross over some water to get where he could watch the buffalo herd he wanted to hunt:

Lions hate water (other than to drink), so once he decided to head across, he did so quickly. So quickly that my vehicle had no good shot of him exiting the water, only entering:

Probably the big discussion topic for the day was the "None of These Things is Just Like the Other" situation we found at one tree:

Why these three birds decided to meet in a tree, I have no idea. Even on the ground you don't often see these three particular species in this kind of close proximity. But this grouping did allow me to talk about a lot of things compositionally. First, note the beaks. If the spoonbill isn't at least partly facing you, you don't see the spoon. But the fellow on the right also has an interesting beak, but you only see that if he's side on to you. One of the things I'm looking for in situations like this is what the sub-text is. In the above shot, the birds are all looking towards the center, as if they're actually "meeting." But what about this variation:

Now they're all pointing their beaks the same direction, so it appears that they're all looking at the same mysterious off-screen thing. I have a number of variations on a theme in my files here, with two birds before the third arrived, and two birds after the third left. Each of the variations tells a slightly different story. My actual composition doesn't change much between them, though it's clear that as the birds moved a bit on the branch I did move the vehicle position slightly to get a better angle. What does change in every shot is the "timing" at which I pressed the shutter release, always coinciding with some alignment I was seeing amongst the birds.
I like simple situations like this when teaching. The birds were pretty cooperative and tolerated our close presence well (I'm at 300mm FX here). Thus, I was able to spend some time describing to the students in at least two vehicles what it was I saw, what I was trying to do about it, and why I was pressing the shutter release when I was. This is also one of those rare situations where I went up out the top of the vehicle. Why? To try to get closer to eye level with the birds. (For more, see the October 2013 Teaching Point.)