Let me state right off that while you can bring a tripod to the Galapagos, you won't always be able to use it. There are a number of reasons for this, but the real problem is that your land time is generally only a small fraction of the day. Using a tripod on a boat doesn't always work (the boat is rocking, so it'll only steady the view of things on the boat. While on shore, you don't want to be grappling with your tripod if your tour group is moving quickly through a visitation site, as sometimes is the case. Photographers tend to be the slowest part of the tour group, and your guide has to keep the group moving at something between the rapid pace of the most bored person and the snail’s pace of the photographer trying to set up his tripod all the time.
Time for a side point: if you're not on a photography-specific tour, it's likely that your Naturalist Guide will move the group along at a pace faster than you’d like, which means you might not get a lot of time with any specific animal. In my workshops, we try to do the opposite: we almost always move at the pace of the slowest photographer. It’s almost always true that at any given site we’re the first boat group on shore and the last one to head back to the boat. I’d judge that the average non-photography tour is on-shore for well less than half the time that the groups I lead are. So, for photography, try to find a photography-oriented tour.
Every land visitation site is either out-and-back or a loop trail, and your naturalist is going to keep the group together and moving. The group has to stay together because of park requirements, and it has to keep moving at some minimum speed otherwise groups from other boats will pile up with you, making the problems even worse. If you’re setting up a tripod all the time, you will slow your group down, almost certainly. But probably not enough to satisfy you ;~).
The animals don’t make using a tripod easy, either. While some—such as the blue-footed boobies and the marine iguanas, will seemingly sit forever in one position with little concern about what you’re up to—others aren’t likely to stay put for long. Some, like the lava lizards, snakes, and finches, may have moved even before you can raise your camera to your eyes.
Moreover, the terrain often gets in your way. On the rocky shores of most islands—where the marine iguanas, sea lions, and many birds are found—you’ll find yourself spending extra time trying to position and level a tripod. Heck, in some spots, you’ll have a tough time trying to figure out where to put your feet, let alone three tripod legs. Thus, make sure your tripod is one that you can set up very quickly in uneven terrain (a built-in level on the head or a leveling head helps immensely). Also make sure that your tripod has tips that convert from gripping (rubber) to spiking (metal points) quickly.
But a big important thing is this: much of what you'll be photographing is on the ground. Literally. More often than not I find myself laying prone to get a photo. A tripod wouldn't help; a ground pod might.
Finally, there’s the issue of carrying the tripod. Getting in and out of the panga with equipment is tough enough as it is without another thing to carry. If, as I suggest elsewhere, you’re carrying a camera body, three lenses, water, film/cards, a towel, some spare clothing, plus other items, you’ll find the weight and bulk of a tripod to be a nuisance.
If you do elect to carry a tripod, consider these things:
- The tripod will get wet with sea water. Carbon fiber, stainless steel, or plastic parts are a must, and you should carry something to dry the tripod off with. I love my Gitzo and RRS pods, because the carbon fiber legs are impervious to anything I throw at them, they're light for their support level, and you can completely field strip them without a tool to clean every part.
- Most of the action is down low to the ground. You don’t need a tripod that reaches up to six feet and holds its own in gale force winds (even though you may encounter such winds). Many Galapagos photographers get by with small mini-pods or tabletop tripods. I bring a ground pod.
- The Alcedo (or other volcano) climb is so strenuous that you will want to leave your tripod behind. Don't. The weight, no matter how insignificant, will make its presence known within a couple hours of walking up the side of a volcano! [Note: Alcedo is currently closed due to feral goat problems caused by sloppy campers. Too many folk left food and other human stuff behind, and now the feral goats have moved into the area. But there are a few other strenuous climbs in the visitation sites, and the same thing may apply.]
- Tripods aren’t much use on a boat unless you’re taking a picture of something on the boat. Even in the gentlest of waters the boat you are will be rocking (in relation to the land). Don’t expect to use the tripod on the boat to get a great picture of the moon rising over one of the islands, for example.
- A good head is more important than good legs. While the animals of the Galapagos are remarkably cooperative, when they decide to move, they move fast. If you want to have any chance of following them, the head on your tripod should be fluid, easy to pan, and not subject to skipping or catching.
Okay, so you're not always going to be using a tripod, how about a monopod? Actually, monopods are an excellent compromise in Galapagos. If you're on the islands first thing or last thing, there may be times when your shutter speed is slower than you can comfortably handhold. After all, you will sometimes be photographing dark animals in dark places (tortoises under trees, marine iguanas in the cracks of black rocks, and so on). It isn't always sunny, either. A monopod can be set up quickly and provide adequate support for most shutter speeds down to 1/8th of second, assuming of course that you don’t have the jitters and aren’t shooting in 50 mph winds.
The same precautions apply with monopods as with tripods: water-resistant components are best, rubber tips and metal spikes are both useful, and the head should be adjustable for fast action.
Your biggest problem with monopods will be carrying them. If you strap them to the back of your day pack they’re prone to catch on tree branches and rocks on some of the trails. Worse still, despite my care, mine would occasionally poke another tour member. Mount the monopod (or tripod) vertically on your daypack to avoid the biggest scrapes, and watch carefully when you’re in tight or narrow quarters. I saw one member of another tour leave his monopod permanently attached (and extended!) on his camera—he simply carried his camera upside down, leaving the monopod to poke into the sky like an oversized radio antennae. Needless to say, this looked cumbersome, and the frown on his face showed he wasn’t enjoying himself.
A better solution would have been to get a monopod with a quick-release head. Thus, the camera remains permanently attached to the mounting plate, but the monopod pole can be removed and mounted on your pack or used as a walking stick (quite useful at times!). The better quick-release units take less than a second to reattach, making it more likely you’ll get your photo with the support you desire.
You can get by without any camera support. For low-lying photographs lay prone on the ground and use your elbows and the camera body as the three points of a tripod—i.e., rest each on nonmoving surface and you have get a tripod-like steadying effect. You won’t want to set your camera directly on the surface of most of the islands, by the way, so carry a small towel, beanbag, or remove your T-shirt and use it under the camera to temporarily to keep the camera body from contacting the lava flows directly (women: if you remove your t-shirt I probably will stop photographing the native animals and focus on you instead ;~). I’ve found this technique quite effective for photographing marine iguanas and some of the ground-sitting birds.
If you’re standing up, you’ll sometimes be able to use trees and rocks to help steady you. Instead of bracing the camera against the object being used, I tend to back up into the tree or rock and brace myself against it with my two legs spread in front of me. This allows me to rotate to follow action while still giving me added support (my legs and the object again form a crude tripod, with my upper body and arms becoming the fluid head). I’ll often use this stance when photographing birds flying overhead. But be careful. Some of the trees in the Galapagos have nasty sap or thorns you won't want to be cuddling up with. Ask your naturalist before cuddling up with a tree.
Fortunately, the islands are loaded with rocks to brace yourself and your camera against. Just remember that many of the rocks and lava formations near the water are covered with sea spray, so you’ll want to be careful about setting your camera directly on them (and lava scrapes the heck out of plastic camera bodies). Likewise, some of the trees, like the Sancto Paulo, have sap that you’ll want to keep off you and your equipment. Sure, the Sancto Paulo sap doesn’t smell bad, but it’s still sticky and gummy, and, if left on your camera body, will eventually attract dust and grit that are even more of a threat to your equipment.
Panga Support
Finally, a word about photographing from a panga.
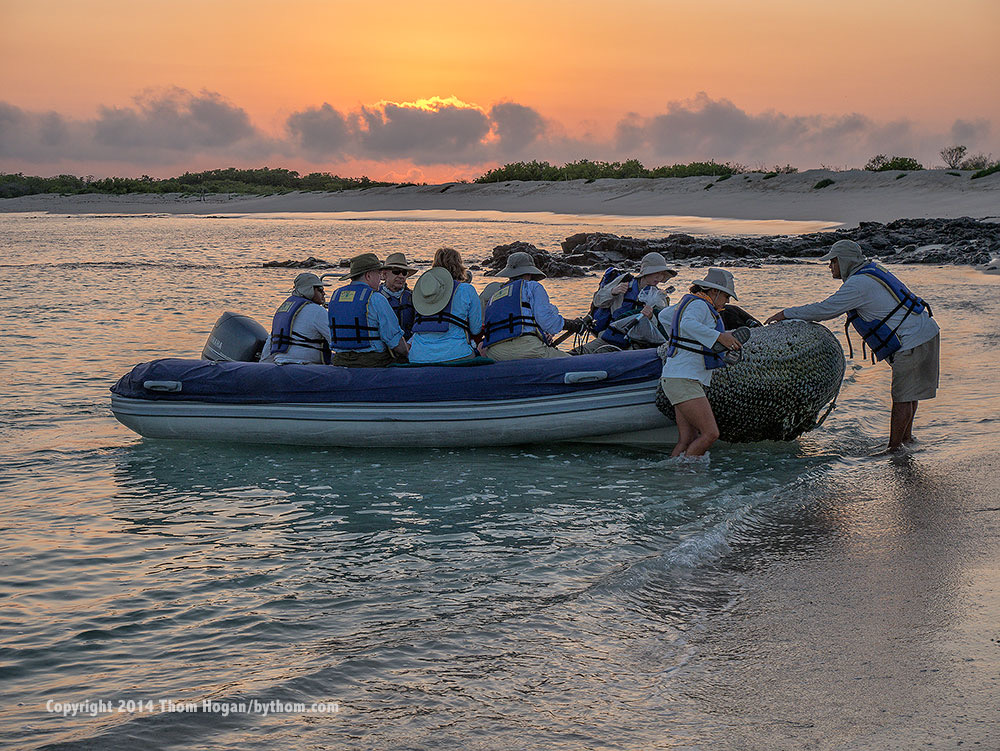
At some of the visitor “sites” you’ll be taken on panga (zodiac) rides around interesting rock outcroppings or through mangrove swamps. You won’t be getting out of the panga, at least not intentionally! You’ll still want to take your camera (the spare, preferably, as your gear is more exposed on panga rides), because some of the things you’ll see will be quite unique and photogenic. Getting photos from a panga carrying 16 passengers, a guide, and a driver can be a bit problematic, however. From the sitting position most of your field of vision will consist of other humans, not the animals you want to photograph.
You’ll be tempted to stand up. That’s potentially possible if you follow a few basic rules:
- Work it out with the guide first. They don't like surprises, and they may not see it as safe in some situations.
- Only one person should ever be standing at once. If everyone stands the boat is much more likely to capsize. Thus, work out comfortable arrangements with the others in your tour so that you all get your chance and don’t all try to stand up at once.
- Stand across the keel. Boats rock side to side. If you stand along the keel—feet spread along the length of the boat—you’ll find that you have no support against the natural rocking and are quite prone to falling. Spread your legs across the width of the boat, making sure you have a good footing for both.
- Stand slowly and sit slowly. Fast actions almost guarantee disaster. Have someone else hold your equipment, stand up, get stable, then retrieve your equipment for photography. Reverse the process when you’re done.
- Don’t push it. If the waters are choppy, the panga moving fast, or the crew and passengers restless, don’t risk dunking yourself, others, and everyone's equipment. No photo is worth it.
Fortunately, most tour guides and pangamen are used to the camera-carrying tourist who wants that “great” image. All will help you if you ask, and many will even keep the panga coming back to one spot so that everyone who wants to can get the photograph. Your tour leaders will also tell you when you’re going too far and suggest that you cool it, but don’t let it come to that. If there’s a photo you want to try to get, let the guide know and ask him or her if they can help you get it. Maybe they can line the panga up so that you don’t have to stand, or sometimes they’ll help steady you or hold your equipment while you get situated.
Before closing out this section, I’d be remiss if I forgot to remind of the alternatives to using camera supports:
- Use a wider angle lens. Shorter focal lengths can be handheld easier than telephotos.
- Use faster film or a higher ISO value. Even Velvia can be pushed satisfactorily, so don’t be afraid to up the ISO to get handholdable shutter speeds. Likewise, on digital a bit of noise is often better than blurred shots.
- Use a small reflector. A modest amount of extra light can help out an otherwise untenable situation. Since flash photography is now banned in the Galapagos when shooting animals, a reflector is a decent substitute, especially since there's usually plenty of overhead sun (you're at the equator, after all). The park service's theory is that flash terrorizes the animals, but I've never seen any evidence that they pay any attention to it. Some guides look the other way when a photographer pulls out a flash (at least if they aren't putting it right in the animal's face), but you're in a country that has a tough enough time keeping the Galapagos wild and animal friendly, so I strongly suggest that we all follow the laws. When locals see that tourists don't follow the rules, they think that they don't have to, either. And that kind of attitude could quickly end the Galapagos' unique nature. So bring a small mild (white) reflector instead.
- Use IS or VR. Image stabilization is the primary solution to portable "support" on the islands, and especially from the boats.