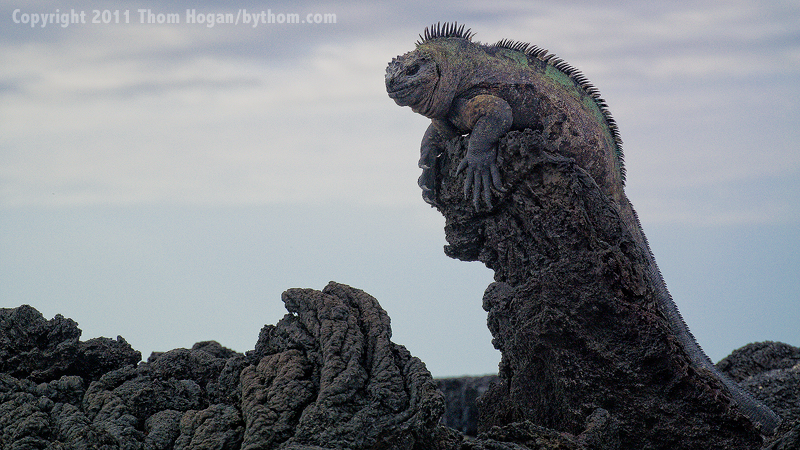
Be careful about some of the advice you get about what equipment to take to the Galapagos. Everyone assumes that because the animals are so approachable you just need a mid-range or standard zoom. Things are much more complicated than that, and you should spend some time thinking carefully about what you bring and why.
Here's what I took in 2017:
- Nikon D850 — primary camera
- Nikon D500 — secondary camera
- Nikon AW1 — snorkeling camera
And here’s what I'd likely take today:
- Nikon Z8 — primary camera
- Nikon Z8 — secondary camera
- OMDS TG-7 — snorkeling camera
That's three cameras on every trip. That may seem like a lot, but when you consider the amount you’ll spend getting to and around in the Galapagos, you'll want to ensure that you come back with great images.
Use my comments here to select your correct photography arsenal to bring with you; they're based upon ten trips over 20+ years.
Bring Quality
A quality, autofocus camera is useful in the Galapagos. You’ll be surprised at how fast iguanas move when they want to, and along the cliffs you’ll want reliable and fast autofocus for the birds swooping and soaring.
Recent DSLRs and mirrorless cameras are both decent at this, though the high-end cameras with sophisticated autofocus systems do better. There's plenty of light and contrast in the Galapagos, as you're only photographing during daylight hours. Except for birds in flight you'll even have time to focus and reframe much of the time. But the best images require a decent autofocus system and your ability to control it.
You’ll want spot metering, exposure compensation, and probably exposure bracketing in your camera if you’re unsure about exposure, but most of the time you’re on the islands the exposure is basically Sunny 16 (f/16 at 1/ISO).
The operative word is quality. The Galapagos are one of the prime photography sites in the world, and it is hard on equipment. You have heat, humidity/condensation, water, and nasty volcanic rocks to deal with, amongst other things. You’ll want the best possible equipment with you that you can afford to bring.
Weather-sealed cameras are better than non, but you still need to be careful about moving gear in and out of your air conditioned cabin to the visitation sites. On our photo workshops in the Galapagos we leave our cameras out of our boat cabins in a communal area that isn’t air conditioned whenever possible.
Next in my required feature list is a plethora of information in the viewfinder. If you’re really taking photos, you’re looking through the lens most of the time. A viewfinder is preferred over just using the Rear LCD, as it can be quite bright out; moreover, some displays don't work well with sunglasses. You will absolutely miss some picture opportunities when you’re not looking through the camera. Thus, any camera that forces you to take it away from your eye to see what aperture or shutter speed it set is not good enough in my book. You'll miss key moments.
Fortunately, most current cameras are good in this respect. The more information you can see in the viewfinder, the better.
Let me emphasize: cameras that require you to hold them in front of you and compose on the Rear LCD aren’t nearly as good for the Galapagos as cameras with viewfinders. The bright sun will make seeing an LCD difficult (hint: bring a Hoodman for the Rear LCD and/or wear a large brimmed hat). Holding the camera out in front of you ain't so great either, as it makes it less steady. The exception to that is while snorkeling: holding your camera at arm's length underwater works just fine.
Metering
A word about metering, since you'll be thoroughly tested on setting exposures in the Galapagos due to the extreme sunlight. The big issue you'll face is that there are white birds, and most of the terrain is deeply black lava rock. There are also dark-colored birds flying in the bright sky. In other words, you'll encounter tonal extremes.
Take the typical Galapagos penguin, for example. He’s black with white markings. If your meter mostly sees his black body markings (and he'll usually be standing against a black lava flow), the exposure the camera suggests will generally make him come out as some form of gray (no matter what you point the camera at, it assumes that is middle gray, so that the resulting image ends up overexposed).
If you’re lucky enough to get a real close-up of an adult penguin’s face, the meter will see all that white and try to make it gray (underexposure).
My solution in such circumstances is to use the spot metering capabilities of my camera to find and set the exposure for something that’s about middle gray and is in the same light as the subject I’m photographing. Sometimes I get lucky and the rock the animal is sitting on will be about the right gray, sometimes I have to fake it and take an exposure reading off my hand (it’s about middle gray when it isn’t too tan).
Another way of dealing with exposure is to use the Sunny 16 rule (f/16 at 1/ISO). On the typical hot, sunny Galapagos day the right exposure won’t be far from that for things in the sun.
Digital camera users have an advantage in that they can examine the histogram for an exposure and evaluate whether they need to make adjustments. One thing, though: you're on the equator and the sun is bright! If the Rear LCD on your digital camera isn't easily readable in bright sunlight, get a Hoodman LCD Loupe or other shield so that you can see it. On many of the islands, there won't always be a place you go to "get in the shade" if you need help seeing the LCD. Also, if you’re wearing polarized sunglasses, that’s going to make it more difficult to see the LCD. Wear a wide brimmed hat and you can solve both problems.
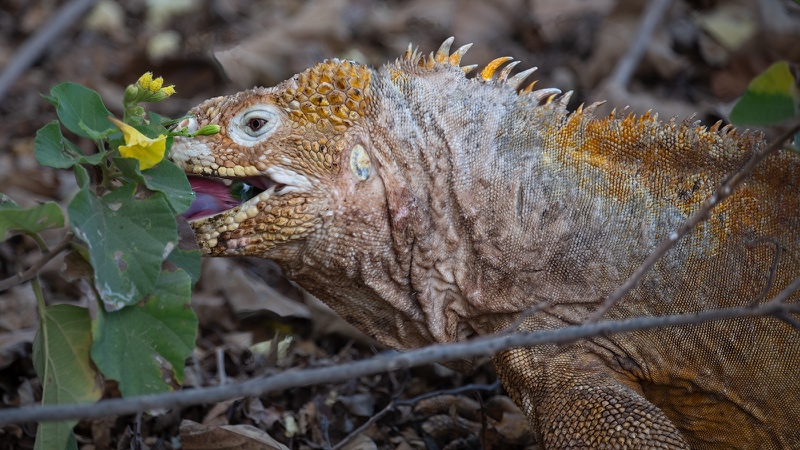
For what it’s worth, very few of the animals and plants in the Galapagos are anywhere near middle gray (the land iguanas and parts of the Galapagos Hawk qualify), so consider carrying a small gray card with you. Most of the birds are either white or black. Most of the reptiles are dark, while a few are light tan colored. The turtles and tortoises are dark. Most of the water-going animals, like the sea lions and turtles, are also quite dark (a few of the sea lions are light tan, which poses another problem on the sand).
The settings you’ll find the animals in range from black lava to white sand, with very few middle values in between. The sky ranges from foggy white to bright, but still quite light, blue. The ocean is generally darkly colored.
You might think a matrix meter will take all that into account. Don't count on it, though the Nikon matrix meters do a decent job in the Galapagos (other cameras I’ve used do a less good job, in my experience in the islands, particularly Canon). More so than just about any place except the lava fields in Hawaii, I find matrix meters have a tough time figuring out the perfect exposure in the Galapagos. They'll often be close, but something about all that dark rock and dark animals and bright sky just isn't in their design to handle spot on.
You should get the idea that you’re not photographing in a studio or a controlled situation. Spot metering, used correctly and judiciously, will get you better exposures than virtually any automatic mode of any camera I know. Of course, used incorrectly, you’ll end up with some pretty awful images, so make sure you have some experience at using your spot meter before you travel.
Nikon matrix metering does okay, as I noted, but some bodies tend towards underexposure in my experience on the islands. Many of the consumer DSLRs (the D80 was notorious for this) will tend towards overexposure in the Galapagos. The good news is that the Nikon matrix meters on the current higher-end bodies (D7500, D780, D850, D6, Z50II, Z5II, Z6III, Z7II, Z8, and Z9) do a quite decent job, probably because they are pretty good at dealing with white and black subjects. The consumer models (especially ones like the older Z30, Z50, and Zfc) tend to overweight what’s under the autofocus sensor too highly, so if that’s lava you’ll get overexposure but if it’s white bird feathers you’ll get underexposure.
Bottom line: learn how to deal with exposures in bright sunlight with both bright and dark subjects. If you haven’t done this before, find a way to practice before you go. If in doubt, dial in a bit of exposure compensation (-0.3 to -0.5) on Nikon matrix metering.
Camera Rules
No matter which camera you choose as your main one, there are two absolute rules you should follow:
- If the camera is more than a year old, have it professionally cleaned and checked before you head to the islands. Why? Because this is a once-in-a-lifetime trip, for one. You’re going to subject your camera to unrelentingly hot sun, high humidity, and blowing salt and sand, and probably in and out from air conditioning. All of this often conspires to push any lingering problems over the edge. Trust me on this. In multiple trips to the islands, I’ve seen six cameras die amongst 60 photographers (and yes, I loaned my backup body to the two who had Nikon lenses). I once had a camera die on me while standing waist deep in water photographing the penguins swimming around me (the last picture from that camera is shown above).
- If your camera is new (or after it has been cleaned), practice with it before you go. For example, stop by your local zoo and take a few hundred images. Besides the camera testing, zoo photography provides you practice composing animals in reasonably close quarters. While you’re there, spend time making sure that you know how to quickly set exposure compensation, spot metering, and bracketing. Find some fast moving animals (or children) and practice focusing on their eyes.
Under no circumstances should you arrive in the Galapagos with a camera that is in questionable shape or is brand new out of the box. You won’t find professional camera repair shops in Ecuador that can work on your camera—especially newer autofocus or digital cameras—nor will you likely find any (affordable) cameras you can buy to replace the ones you brought. That’s especially true if you use anything other than Nikon or Canon equipment. What you bring is what you’re going to have to use. Make sure you know how to use it and it’s in the best possible shape before you get on the plane.
Worse still, once you get to the islands, you won’t find any camera shops at all (though there are a few stores that sell film, cards, batteries, and other accessories). Indeed, during most of your stay, you probably won’t even be close to the few settlements that do exist in the islands. So even if a "camera shop" does open up on the islands, you won't be able to get there unless your itinerary includes that location.
You’re probably starting to understand why I carry a backup camera body and suggest you do likewise: if your camera dies or falls in the water the first day, you’re going to spend the rest of your trip in a serious funk.
Then again, a trip to the Galapagos is an experience you won’t forget, even without photos. If for some reason you lose use of your equipment or run out of film or corrupt all your cards, don’t get mad; enjoy the trip and take solace in the fact that you’re seeing sights and wild animals most people will never see. I also recommend that you spend at least one land visit sans camera—you’ll be amazed to notice things that you weren’t seeing while peering through the camera all day.
If you’re taking a top-of-the-line body as your main camera, buy one of that manufacturer's lower-priced units as your backup. For example, if your main body is a Nikon D850, bring a D500 or D7500 as your backup. If your main body is a Z8 or Z9, even a Z5II can serve as a worthy backup. Even I have done this, though these days I carry two Z8 bodies.
The key is to make sure that your backup camera body can use the same lenses and accessories you bring for your main camera, and that the backup doesn’t change your photographic style or require refreshing your memory about controls.
If you’re really price conscious—and who wouldn’t be after forking over more than $8000 for airfare and boat accommodations—check the used department of your local professional camera shop. Not only will you find lower prices, but you might also be able to dicker the price down or get something extra (like a cleaning for your main camera) thrown in for free. Renting a backup is also a possibility.
If you think relying on one camera body is a gamble you’re willing to take, think again. Your shore landings will be at the whim of the sea. Some require you to wade ashore, albeit usually through shallow, gentle waters.
While there are precautions you can take, your equipment will be in constant peril during your visits. If you manage to keep your camera from getting dipped into the ocean, there’s sea mist in the air, bird droppings (they always seem to hit the pentaprism of cameras or your head, sometimes both), dust and sometimes volcanic ash, and dozens of other culprits all ready to sabotage your photo equipment. Heck, I once watched my camera go flying across the dining room when the Captain suddenly decided to race another boat on a crossing between islands.
I usually take only my main camera ashore with me. That’s assuming that the ocean is reasonably calm. On panga-only visits and in rough waters, I usually take my backup camera instead. The rationale here is that if I’m more likely to lose the camera or damage it, I’d rather have to replace my backup than my more expensive main body. I’ll gladly sacrifice a few features for knowing that my most expensive investment in camera bodies is still safe and usable.
To emphasize this: after an email exchange with someone heading to the Galapagos for the first time recently, where I outlined my “keep a backup on board” point, I received another email from him after his trip. Not only was he following my panga advice, but he also was protecting his gear in a dry bag when not in use. Turns out his panga got hit by a rogue wave and swamped everyone and everything on board. A number of folk had cameras ruined as a result, and had no backup for the rest of the trip. Because the emailer had followed my advice, he was fine for the rest of the trip.
Of course, the best possible scenario is to use two camera bodies that are the same. If your budget allows this, why not? That way you won’t be sacrificing features and won’t have to adjust for differences in the way the cameras work. But I’m not rich, and I suspect you aren’t either, so don’t despair if you have to use a second, less expensive body.
I rarely take both cameras ashore with me. Again, the water landings are often dangerous to photo equipment, as are a few of the paths you’ll be walking. It’s easier than you think to drop your equipment bag (even your waterproof one) into the water, or to fall while crossing a rocky lava flow. I’d rather not have all my equipment with me when I do that. Besides, you’re not likely to have to change lenses quickly.
You can only press one shutter release at a time, so I stick with a single camera at a time. You’re also moving constantly, so having extra gear you're carrying slows you down.
If you absolutely have to have multiple cameras with you on shore, make one a simple compact camera that fits in your buttoned or zipped pocket (you don't want it falling out as you're getting in and out of the panga).
Backup to the Backup
I’m often carrying a compact camera of some sort with me on the islands as well as everything else. I consider this my “disposable” camera because I use it in any situation that warrants a photo opportunity, no matter what the risk.
I’ve waded into the water holding my compact camera above my head, I’ve stood on rocky windblown ridges with it, I’ve set it on the ground and used a remote shutter release or self timer when I didn’t want to stay close to the animals, I’ve photographed with it on panga rides, and I’ve dragged it with me through the dustiest of trails.
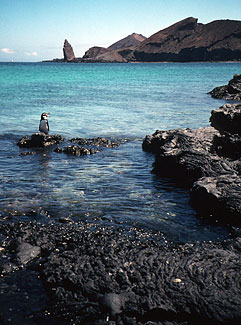
Someday your “disposable” will break. Actually, that someday was the next-to-the-last day of my first Galapagos trip, when I was wading in the water trying to line up a penguin and the famous Pinnacle rock in the same wide angle image (see above). I didn’t get upset, though, since I knew that I’d already taken dozens of other pictures I wouldn’t have otherwise dared try with my more expensive equipment.
Note that these days, many of the better compact digital cameras have optional waterproof cases, which I’d definitely bring to the Galapagos. You'll also note I mentioned the OMDS TG-7 earlier. It's a fine compact camera that can take a beating.
How about smartphones? Well, yes, they can be a reasonable backup to the backup. They're small and easy to carry. Many are water resistant or even waterproof (though I'd still get a small watertight bag for them). However, make sure that you can see the phone's LCD in really bright light, otherwise you'll have troubles framing your images with it.
Underwater
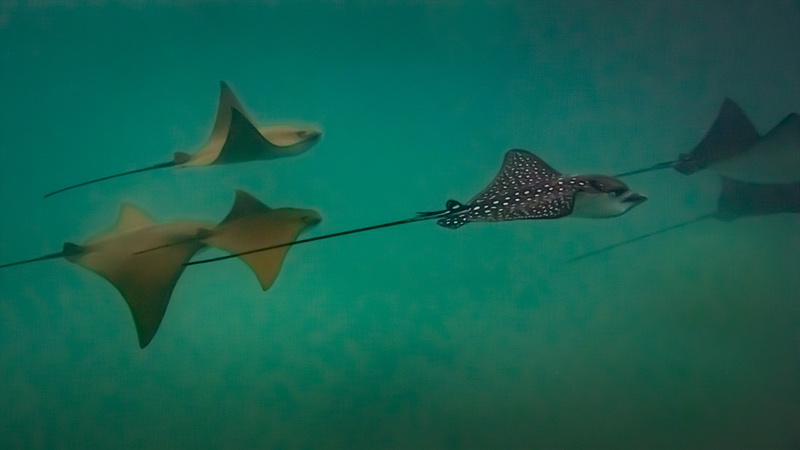
The snorkeling is sometimes absurdly great, though the water can be surprisingly cold on the Western shores. In one cove, we found ourselves swimming and playing with a half-dozen sea lions and literally hundreds of green turtles. I'll never forget seeing a series of sea turtles suddenly swoop up out of the murky water to investigate what was making all that splashing commotion. Another time, I found myself staring at dozens of hammerhead sharks (only to be stung by a school of small jellyfish, dramatically shortening that dip!).
The primary underwater camera used by most these days is either a GoPro-type action camera (really wide angle), or an OMDS TG-7. I use the OMDS these days, as it's more photographically suited than an action camera.
To summarize, I believe that you’ll take better pictures if you bring the right equipment with you to the Galapagos. To my way of thinking that means multiple cameras, one of which is a serious, higher-end camera. You’re free to disagree, but if you do, make sure you know why you’re disagreeing before you jump to the conclusion that what you want to bring will do the job.
What Else?
You’ll need a few other items to keep those cameras going:
- Batteries. Take extra batteries on shore visits with you. Most boats have plenty of electrical capacity, so you don’t need to bring solar panels or an excessive number of charged batteries; you can recharge batteries on your boat. Still, forewarned is forearmed: except for a few of the big capacity DSLR cameras, I'll bet that you'll find single shore visits where you will exhaust a battery while photographing. Have at least one extra fully charged battery for all your gear when you go ashore.
- Cleaning equipment. Soft towels for blotting salt air off the camera body are a must. I also take Q-tips and a large artist brush for cleaning crevices. Digital camera users should bring a full set of sensor cleaning tools. You’ll also need lens cleaning solution to get sea spray off your lenses.
- Instruction manuals. Keep ’em on the boat, but bring them. Most camera makers have PDF versions you can load onto your phone or tablet. If you’ve ever had one of the newer cameras flash one of their cryptic error messages on the LCD you’ll know why I suggest this—you’re not likely to figure out the problem without the manual or a hell of a lot of experience with the camera. Better yet, if your camera is a Nikon, may I be so humble as to suggest that you carry my Complete Guide for your camera? (Complete Guides are available on the dslrbodies.com site for DSLRs, and zsystemuser.com for Nikon mirrorless.)
- Carrying equipment. Since most site landings in the Galapagos have the element of water involved, I now use a dry bag backpack, such as the (no longer available) LowePro DryZone 200 backpack in the islands. This lets me carry all my cameras and lenses, an indecent amount of accessories, and even a change of socks and weather clothing. If you can’t find a waterproof, submergible backpack you like, get a dry bag that your backpack can fit into for those ship-to-shore excursions. Several companies make "dry backpacks" these days. Type that term into Amazon and you'll find an array of options. The one thing to be aware of is these aren't designed like camera bags, so you'll also need some way of protecting your gear from each other when in the dry backpack.