News/Views
Correctly Placing Blame
Okay, you went out and took photos at an event or in a place of interest. You saw other photographers doing the same thing, so you naturally eventually sought out their images to see how they compared to yours. Your conclusion? Your images sucked. Now what?
I've seen multiple posts lately that assert or imply that their images failed compared to those of others because of a difference in gear. Worse still, some believe it was because of a different brand of gear.
I suppose it's possible that other photographers were using better gear than you. Pro-grade lenses, in particular, can have a dramatic impact on what results can be produced. As much as I like, say, the Nikon 180-600mm f/5.6-6.3 VR lens, at both 400mm and even 560mm my 400mm f/2.8 TC VR S lens produces clearly better looking results, plus it has both light collection and background isolation capabilities I tend to take advantage of. Is Sony's 400mm f/2.8 lens better than mine? Well, it could use a built-in teleconverter, but at 400mm f/2.8 I'd take either lens and be happy. So in near apples-to-apples comparisons, I tend to say "it isn't the brand."
The real question you have to ask yourself when you start doing the comparo thing is: what did I fail at?
It's important that you realize this as a failure. Failure isn't bad. That's not just my Silicon Valley start-up mentality speaking, it's a reality: failure is one of the best ways to learn. But only if you (a) can admit that you failed; and (b) figure out what caused the failure.
Let's talk about that (a) part for a moment. More often than not when I see someone comparing their images to others they simply won't admit to failure. It's their image in the competition, so they like their's better. Often they even won't listen to criticism from others because they believe so much of their ego is on the line. As far as I'm concerned, if you're open to criticism, I think you're a far better person than the one that simply insists that they have done something good and accepts no criticism.
So before we even get into reason for failure, are you even admitting you do?
I fail constantly. I get giddy when I don't fail because it happens so rarely.
How do I fail?
- Not being in the right place at the right time. With both sports and wildlife, my two main pursuits these days, both things are critical to get the photo that everyone else will ooh and ahh over. In both sport venues and out in the wilds I'm constantly asking myself two questions: (1) am I in the right place, and (2) what do I expect to happen? If I can't answer those questions, I know I'm going to fail. Either that or I'm going to get damn lucky.
- Not having the camera set right. You probably think of me as a grumpy old man constantly criticizing Nikon's control choices. All of those things are true, but the last one would still be true if I were a happy young woman. Photos are moments in time. You may be prepared for one thing to happen but another starts to occur and you need to reset your camera for that. If I can't do that with a quick button press and maybe a dial twirl, then Nikon has restricted me in a way they shouldn't. Bad Nikon!
- Trying to do too many things. A pride of lions is on the hunt, what photo am I going to get? Well, I want one of everything! The stalker, ambusher, the chaser, the pull down, the bored male waiting for his meal, etc. If I'm lucky I'll get one of those. First, everything happens so fast and happens over such a large area, there's no way I can cover all those things. Second, lions are the fastest accelerators in Africa, so I'd better be fast on the shutter release. Don't like the wildlife example? Try sports. The team I'm covering is about to score and I know the play (yes, that happens when you follow a team closely and talk with the coaches). Do I cover the quarterback throwing the ball or the receiver catching the ball? I can't realistically do both these days, as sideline access is so packed you can't get the position where you might be able to do that. Now me being an analytical kind of guy, I say "receiver" because technically, he's the one that's scoring. Still, my point here is that if I think I'm going to do everything I'll probably get nothing.
I could go on, but you should be starting to understand the (b) part I described above. I'm always analyzing what exactly caused my failure. I should also point out that I might take 500-1000 images in a day's work. Of those, as many as 999 can be failures if I got the image I sought. Realistically, maybe 10-20 of my images in a day are one's that most of you would consider successes. But I also have days where none are. Yep, that's depressing, but it's sort of at the point of this article: what happened? Why did I fail so badly?
Broadly speaking, we have a few categories to consider:
- Wrong gear. I've written this before, but I had a sadistic boss when I started out covering sports; he sent me out with the wrong equipment for the job at hand. Always. He sent me to a track meet once with a TLR and asked for action photos of the running events. When you look down into the viewfinder of a TLR, everything that's moving left-to-right in front of you is moving right-to-left in the camera! This boss's thinking was "this will make him really think about what's important, and it isn't gear." He was right. Even 50+ years ago I was dealing with the "best camera is the one you have with you" thing. Sure, blame the gear, but don't think that absolves you. You were the one that failed. Maybe it was because you bought or brought the wrong gear. Fix that.
- Wrong technique. We've got a plethora of technique type things that can cause image failure: exposure, camera settings, aperture, shutter speed, handling discipline, and so on. These fall into two sub-categories: (a) you made the wrong choice; and (b) you haven't mastered something. Both things are solved by first understanding what caused the problem, then learning how to overcome it, and finally practicing until the right technique becomes second nature. Practice that.
- Unclear concept. A photograph is your statement about something. Do you know what that "something" is? If you know the something, do you know what you're trying to say about it (your "statement")? My mentor Galen Rowell used to spend weeks prior to big trips conceptionalizing. He knew well before hand not just what it was he was likely to encounter, but he knew its history and context. He'd think about the likely ways he could capture the "somethings" and make a "statement" about it. He did not wait until he was standing there having discovered "something" for the very first time and then spontaneously try to frame it before it went away. Moreover, as he was walking through an environment—Galen was mostly an outdoor adventure photographer—he also collected thoughts about how the place made him feel, and would contemplate how that might translate into a photo as he moved down the trial (or up the cliff). If you asked him, he always had a concept of what it was this next photo might be before he pressed the shutter release. Here's one way I deal with that with students: you can't press the shutter release until your photo has a name. You don't have a clear concept if you can't name it. Name photos.
- Poor choices. f/4 at 1/2000 and ISO 100 is the same exposure as f/22 at 1/500 and ISO 12800. One of those is probably not a good choice for a landscape photo where you want to resolve details. Sometimes gear choices intersect with this, as you can't do f/4 on some consumer zoom lenses at certain focal lengths, but I constantly find people getting all/most of the above right and still managing to do something clearly wrong with an in-the-moment choice. Note that it's always preferable to "press the shutter release" when a moment comes, but you need to realize that you are set wrong, make the setting change, and hope the moment is still there or comes again. Better still, you need to get good at anticipating the moment. Every photographic specialty has its moments, and you can learn which ones are likely so that you can be set correctly. Choose wisely.
- Bad processing. This one starts to happen in camera with wrong technique and bad choices, but much of the time it happens back at home when you're either trying to "fix" those things or enhance the image. Here's a little surprise for you: your camera has more dynamic range than you're likely going to be using. Your eye can only process a max of eight stops at a given time (pupil dilation increases that, but that's over time). A print maxes out to about eight stops, but is probably less for many papers/inks. The least common denominator of displays (sRGB 8-bit JPEG) is going to restrict you to six stops. Holy bit depth, Batman, that's not much! If you're twiddling the Exposure, Highlights, Shadows, Whites, and Black sliders in Lightroom, you'd better know what you're actually doing and what you're trying to show. In essence, you move tonality, spread it (add contrast), or contract it (reduce contrast), and do that with different ranges of tonalities differently. Most people do this willy nilly until it "looks good" to them, and often without considering how it's going to be viewed. But there's also the issue of did they control what the camera captured correctly. The number one sin tends to be underexposing in the camera in a way that forces them to move the primary subject's tonality significantly upward, which exposes noise, which leads to noise reduction, which leads to edges not looking quite natural. You know who thought extensively and wrote about all those things in great detail? Ansel Adams (though it helped that most of the time he was not considering color). Go Ansel.
I don't tend to fail at #1 or #2. I can sometimes make a #4 failure, too. #3 is something I used to have big problems with, but Galen set me on a path towards correcting that. I was also very lucky to work with and study a couple of the very best post processors in the business early on, so usually if I have a #5 failure, it's because I'm working too much in a hurry.
Oh dear, that just brought up another aspect to analyzing failure: speed. The only way you can work at speed and not keep failing is by practicing enough so that everything becomes second nature. Even then you'll make a mistake or two from time to time.
One thing I've noticed in watching people photograph—and I do that any chance I can get, because it's so informative—is just how many people are (a) get to a place; (b) pick up the camera; (c) take a quick photo; and (d) move on. No time contemplating, no time checking or making settings, no questioning their choices, and often very bad handling because they're moving so quickly doing things. I expect those folk to fail.
And again, failure is not a bad thing, as long as you take the time to learn from it. Be honest with yourself. Get others to help you evaluate what you're doing and what your results are. Seek advice. Be open and ready to change (and practice!).
Still need motivation to tackle this? Here's the kicker: people who fail a lot and take the time to learn from that are the ones who progress the fastest and the furthest. Fail long and prosper.
Article also added to Learn > Improving the Photographer
The Fujifilm X half Arrives
Well, at least it's different.
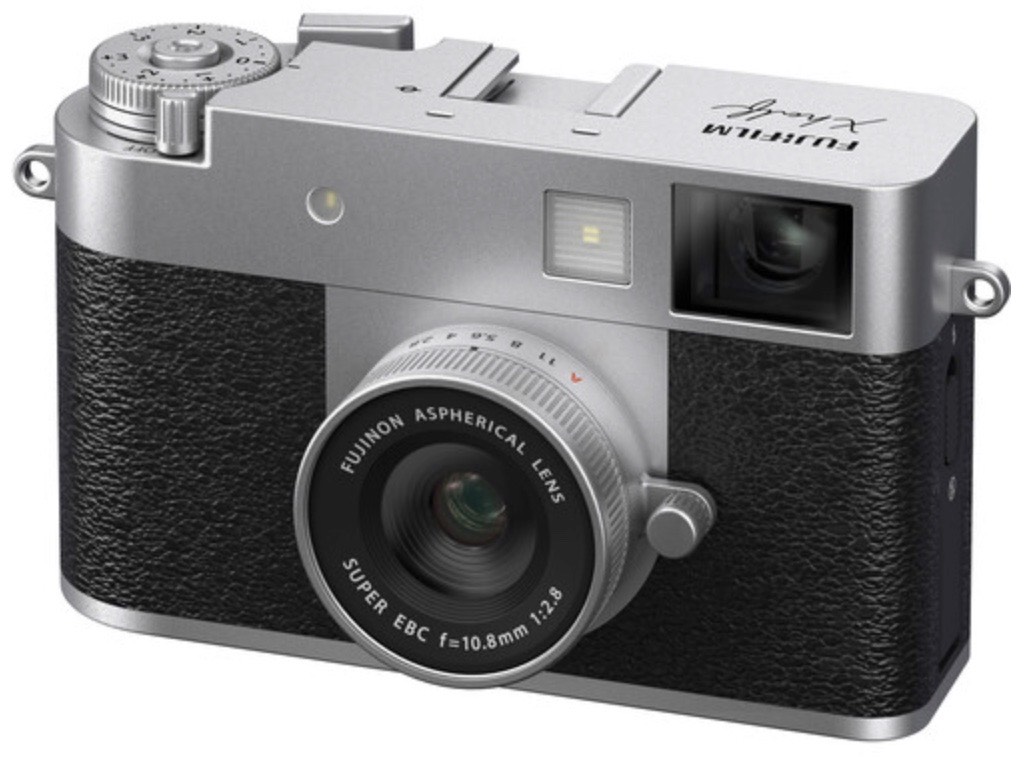
Fujifilm today introduced their odd new compact camera, the X half. It's half X100, half fad starting, half over-thought, half film nostalgia, and half half frame, all rolled into one. At first glance there's a lot to unpack. At second look, it's a pretty simple camera that is trying to win you over with its "differences."
That starts with using an 18mp 1" image sensor vertically, and thus the Rear LCD is vertical, as well (and small at 2.4"). While it looks like it has a viewfinder, that's really a static optical framing tunnel with no information relayed. You get two dials, one switch, one button (besides the shutter release), one swipe area, and one film-like (advance) lever. You can only take JPEGs (or half FullHD videos). It even has a near-lens flash to produce red-eye.
Much of what Fujifilm's trying to push here is style, not substance. The press release says "rediscovering and reinventing the charm of film photography in a digital format." To me that's a bit like doubling down on a cheaper and less sugary soft drink they already are vested in. It's "cool" to limit yourself to the number of exposures a roll of film can provide, for instance, though apparently Fujifilm thinks that 12, 24, or 36 isn't enough, so it's 36, 54, or 72 on the X half instead (ironically, the battery lasts 880 images CIPA ;~).
The Sigma bf camera was a rethink at simplification of the photo capture process. The Fujifilm X half is a whimsical impression of what photo taking should be like. It's nice that we're getting camera companies thinking outside the box they're in, but there's a lot of style over substance going on in these new designs. And in adding style, your options get simplified and focused, not necessarily where you'd want them to be.
No doubt the creator/influencer market will rush to Fujifilm X half and it will sell well, at least as long as whatever fad this is lasts. dpreview described it as "profoundly silly." I wait for a proponent of "take only one image a day" quests to take up this camera. They won't have much to think about except what's in front of the camera every day, and if they use the film mode, they'll be waiting at least a month before they can see a full "contact sheet" of their images and change to a different film simulation.
For about the same price (at least here in the US), Fujifilm also sells the X-M5 with a kit zoom. More and better pixels. More and better control. More and better speed. More and better focal length. More and better video. Same film simulations. That should tell you something about the X half. It's less than half the camera.
ANNOUNCING: Mastering Nikon JPEGs
Usually when I go quiet, it's because I've been hard at work on something. Sometimes it's client work, sometimes it's a workshop, sometimes it's a big review, sometimes it's redesigning Web sites, but more often than not it's because I'm deep into finishing a book.

Today I'm announcing an ebook that should appeal to anyone with a Nikon camera dating all the way back to 2007 (D3 and D300). That's right, my new book is not camera specific. Welcome to Mastering Nikon JPEGs.
When Nikon introduced EXPEED, they introduced their processing and color model for the next 20+ years. While they've added features, such as a handful of new Picture Controls and a couple of new Picture Control parameters, everything else has been remarkably consistent from the D3 all the way through the Z9 (and beyond...). Set a D3 and Z9 the same way and you get the same results. As it turns out, there have only been three major additions to Picture Controls in the 18 year history of EXPEED that impact what you can do with JPEGs. Aside from those additions, every Nikon camera from 2007 to the present, including Coolpix, can create a JPEG image that looks exactly the same as a D3 JPEG.
I waited for Nikon to document what they were up to, but it seems that information about dealing with Picture Controls has actually gone backwards and more difficult to find in recent years rather than becoming more broadly marketed and disseminated. Sure, Nikon keeps touting whatever the latest widget they added to how EXPEED creates out of camera images, but then they don't always explain why (and sometimes even how) you'd use it. I guess once Nikon figured that they were catering to "creators", the creators themselves would creatively figure everything out ;~). Rapio creationem.
Starting with the Z9, understanding JPEG creation became even more important given that Pre-release capture can't create raw files, only JPEGs. Sports and wildlife professionals now needed to figure out how to create better JPEGs. When Nikon marketing didn't step in and start telling everyone how to get the best possible JPEG images out of Pre-release capture, of course I started getting questions about that.
When I start getting a large number of common questions I typically start writing an article. I realized pretty quickly, though, that Nikon JPEGs needed more than an article, they needed an entire book. So that's what I've created.
Mastering Nikon JPEGs is 344 jam-packed pages of information that will take you through everything you need to know to create images that look great (and the way you want them to) right out of the camera. The heart of the book is about Picture Controls, that EXPEED-powered engine that Nikon first created for the D3 and has used and extended ever since. However, we also have to take a couple of other stops—broadly "exposure" and "white balance"—to work through the entire process of creating great-looking JPEGs. And yes, not only do I fully describe what's happening with the Picture Controls, I'll take you all the way through the process of creating your own (or using some pre-made ones others have created).
While there's a little bit of "geek" in Mastering Nikon JPEGs, I've tried to keep the book approachable and easily understood. If you read it from front to back, it builds the knowledge you need create great-looking JPEGs step by step. (Perhaps in future editions I will add some extra geek, as there's a lot happening under the covers that could use further explaining.) While my Complete Guides for the various cameras do cover some of the same topics, they don't do so in the structured way I do in this new book. Moreover, writing more broadly allows me to focus you not on the camera menus, but rather on the process you use to create great out of camera images. I talk about style—without forcing you to one particular one—and much more that really doesn't fit in a camera instruction book. This is photographic instruction that I'm dealing with in Mastering Nikon JPEGs, not camera instruction. That's an important distinction to understand.
This new book is the first in a series of three I've been working on that deal with the kinds of topics that I mostly help workshop students with. While I do often deal with camera issues at workshops, the primary goal for my teaching is dealing with photography issues. If you're going to take great JPEG images, you need a structure to think about how you do that, and you need information about the key things that you should be controlling. That's exactly what you'll find in Mastering Nikon JPEGs. No fluff. No deep drills into esoteric features you might not actually use. Nope. My new book concentrates on one thing: you want great JPEGs right out of the camera, so how do you get them?
You'll find my new book on the zsystemuser.com site today (and on the dslrbodies site as soon as I get time). If you're willing to spend US$39.99 to find out what I've been (mostly) working on for the past six months, you can click here to get started.
Only use raw (NEF)? The tools you're using to evaluate exposure on your Nikon are all solely based on the JPEG output (e.g. histogram, highlights, and zebras). Get your JPEG settings wrong and those tools will lie to you about the exposure in your raw file. Check your camera. You raw users probably are set on the default Picture Control, which is Auto. As in automatic contrast, automatic sharpening, automatic saturation, and more. I've seen raw exposures as much as a stop-and-a-half off because someone trusted the in-camera exposure tools and they tripped over the JPEG settings. While I don't dwell on this in my book, it's a reason why Mastering Nikon JPEGs should be read by every Nikon user.
The book comes both as an ePub and PDF file. The PDF file is structured for printing (but can be read on your device, too).
Site Warning
This is my year to redesign my Web sites. Because of that, I'm going to take two big chunks of time away from daily/weekly publishing this year:
- June 20th to August 20th
- November 15th to December 31st (okay, probably January 2nd, 2026).
If Nikon announces something important, or there's another key event that happens during those time frames, I'll likely post briefly about it, but my goal is to use my time during those periods programming mostly bythom and zsystemuser from scratch (CSS, Tailwind, PHP, and JS/JSON mostly). The overall idea is to create something "more and better."
So if you notice a long period of silence from me, trust that something interesting is brewing in the background. Meanwhile, all my sites are broad and deep with information already, so perhaps take the time to drill down into some of the sections you haven't looked at and see what you might find (for example, I recently published the pinouts for the MC-DC3 connector on the Z50II and Z5II; yeah, I do a lot of little additions like that without making an announcement.).
What's So Important About JPEGs?
Since I just published a book centered around JPEG creation, this is a good time to remind people of just how important JPEGs and their settings are. I'll use Nikon cameras as an example here, but similar things apply to virtually all the cameras you might use.
- JPEGs are the default. Let's say that you reset your camera somehow (via firmware update, via actually using Reset all settings, because of a bug that triggers a camera reset, or by accidentally hitting the two green buttons simultaneously, Nikon's default, as with all camera makers, is to create a JPEG file. If you take your camera out of the bag and don't remember or catch that it's been reset, you're going to create JPEG files. How many depends upon how much you're paying attention. But if you follow my advice, you're always paying attention, because:
- Exposure tools are based upon JPEG settings. Even if your camera is set to take raw images, any exposure tool you bring up is getting its data from the JPEG flow. That includes the histograms, highlights displays, and even zebra stripes. Get white balance wrong or have automatic settings in Picture Controls (or the wrong Picture Control and/or parameters), and the exposure tools will lie to you. I've seen people saturate channels this way, and I've seen them severely underexpose, resulting in more image noise than they should have gotten.
- JPEGs are what you see on the camera's displays. Nikon these days has multiple JPEGs embedded in your raw files. Some are used for thumbnails, some are for particular camera display functions, but there's also a full-sized JPEG basic one there, too. If you're looking at an image on your camera using one of the camera's displays (EVF, Rear LCD, even HDMI connection), you're not looking at raw data, you're looking at a JPEG created with whatever settings were in place when you took the image.
- Pre-release capture can only create a JPEG. Actually, that's not the only function that does, Multiple exposure and HDR (overlay) do, too. When photographing sports and wildlife, I've watched photographers go from taking regular images to deciding to use Pre-release capture to capture a fast action sequence, but then never pay any attention to what their JPEG settings might be as they do. Nothing like throwing away 90% of the data and getting that wrong, it'll ruin your day sometimes.
- JPEG settings can inform raw processing software. This is easiest to see with Nikon's NX Studio, where that raw processor picks up every camera setting and processes (initially) exactly the way the camera would. But it's also true that you can set Adobe software to "Camera Matching" and get reasonable facsimiles of what the camera would do in processing. If you've set the camera well, this can simplify your post processing of raw images, because you'd be concentrating solely on the things that you can't do in camera.
- Pushing to SnapBridge or NX MobileAir is usually about JPEGs. At the default of 2mp images, those aren't raw files that SnapBridge is receiving on your mobile device. Generally the point of using the move-off-the-camera wireless functions is to get images for social media use quickly, and smaller JPEGs do that faster than anything else you can create. That's why Nikon put those defaults in place: they assumed that you wanted really fast transfers. Why would you want your social media post for an image look worse than your eventual wall-sized print?
- JPEGs are understood by everything. Pretty much everything that can display an image understands JPEG files. JPEG is still around because it's become the lowest-common denominator for images. So much so that you don't even have to provide a Color Profile along with the image data; all those programs showing you a JPEG will just assume sRGB and a universal gamma, which is the way your camera created the JPEG in the first place.
- JPEGs can be incredibly small, yet still present an eye-catching result. The 45mp cameras can produce files with all those pixels in as little as 3MB of file space. That means you could fit almost 11,000 of those images on a 32GB card. I could put my entire catalog of A images easily on such a card using JPEG. And if I got all the settings right, those images would still be impressive to those I share them with.
Photographers wanted built-in automatic exposure meters in their camera because it avoided them having to go all Ansel on the problem of what aperture and shutter speed to use. Then they wanted autofocus because it avoided them having to figure out where the focus should actually be or rotating a dial to keep up with subjects. In digital everyone wanted automatic white balance because they had no idea what a Kelvin or MIRED was, let alone what to do about it. After Lightroom appeared everyone apparently decided that it was safer to take raw images, because they could "always fix it in post." If you get the impression from that we photographers have been getting lazier, you're correct.
I understand why, too. I've cataloged easily well over 600 decisions that you make (or assume, or the camera makes) that are necessary to contemplate to create great images. Images that are yours, and stand out from those of others. You don't want to face all those decisions, sure, it's daunting to say the least.
However, as I point out in my latest book, Mastering Nikon JPEGs, it's really just three things you need to think about to get JPEGs right: tonality, color, and style. Two of those may not vary in any photographic situation you're in, and maybe even all three don't vary at times. Thus, I'd argue that it pays to put some attention on how your camera is dealing with JPEGs, no matter what the situation you're in, what you think the time constraints are, and even if you're taking raw photos. Mastering JPEGs with your camera is a big win towards becoming a better photographer, and it's not as big a problem to make those decisions as you might think. You do, however, need to know what the primary three things to control are, and what your options are for each. Heck, if you even master one of the three things, you're probably already creating better JPEG images.
Ignore and avoid JPEGs at your own peril. Take the time to embrace what they do and maximize that potential.
This article is also now archived in Learn > Taking Photos Techniques.