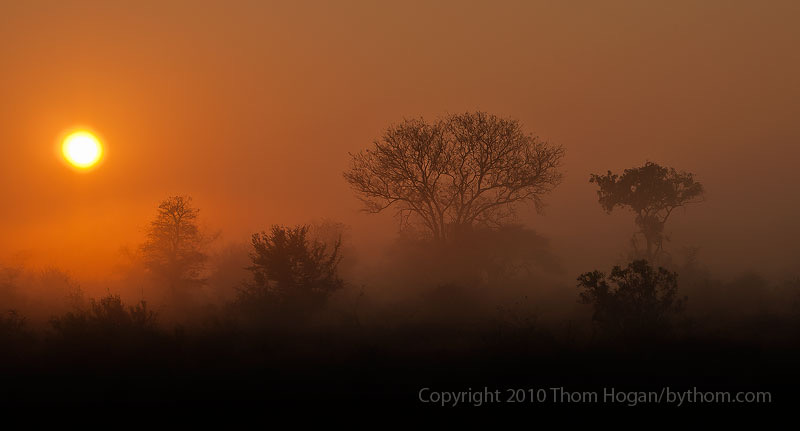
Morning Mist. Olympus E-P2, 9-18mm lens.
Since this is Africa month for me in my travels, it seems appropriate to use an Out of Africa image for the teaching point this time.
Yes, there's something entrancing about sunrise and sunset in Africa. The skies turn amazing colors and the landscapes often look slightly alien to Western eyes. The strange looks to the landscapes have to do with the different trees (acacias, baobabs, etc.), and the sky color is probably partially the result of the dust that gets kicked up. But that's not today's teaching point.
The question that comes up every time I show an image like this is usually about exposure. Some cameras, like the E-P2 I used here, actually try so hard to retain highlight detail that they come close to the proper exposure the minute you throw the sun into the frame like this. This is typical of many compact cameras (but definitely not all). Still, even with those cameras, you'll find that highlights still blow out. In this particular image, look at the slight yellow ring around the blown out sun itself. If that ring were not visible, I'd say the camera was overexposing for the silhouette type effect I wanted.
On older Nikon DSLRs (D40, D50, D70, D70s) and some compact cameras that still use CCDs, the sun itself probably wouldn't even be round, either—there would be bleed artifacts from the electron over saturation, artifacts that run towards the edge of the frame the data is collected from.
For most cameras, the best way to go for silhouette-type sunrise/sunset shots like this is to use the spot meter option most cameras have these days. Spot meter the sky about 5 to 10 degrees away from the sun along the horizon (how much away from the sun will depend both on how small the "spot" is in your spot meter and how far you want to push things into silhouette).
Also, be careful about getting too centered in your composition. Centering implies symmetry. It's fairly rare that you'd put the sun in the center of frame (horizontally) at sunrise/sunset, as the horizon of the landscape in front of you is not likely symmetrical. If the sun is anywhere near center frame—as it would be if you positioned it horizontally centered and used the usual 1/3 horizon line suggestion that far too many textbooks say is correct for landscapes—you'll have a quasi-symmetric composition that doesn't look right. Remember, the eye will always go to the brightest spot in an image and keep coming back to that, so be very careful where you position the sun itself. It might be if you've isolated one tree (the classic Africa Acacia sunset shot), but don't just automatically place the rising/setting sun in the middle of the frame horizontally. You'll note that in this shot I'm using some aerial perspective, too. The darkest areas are to the right of the frame with little aerial perspective, but the left side gets progressively brighter as you move left and away from the camera. I'm driving the eye diagonally towards the sun. Unfortunately, there's no real payoff for that in this shot other than a white dot. Overall, the composition here is more about "mood" than "story." If you want to see the difference, check out the shot on this page: that's story in silhouette, with mood as a supplement. Here, there's no story and all mood.
